czwartek, 25 kwietnia 2024

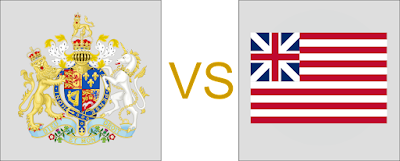
Bunker Hill, 17.06.1775.

Another game from our American War of Independence campaign: Michael has prepared the Battle of Bunker Hill for us. We used Black Powder rules to play.


SCENARIO: Michael Schneider
UMPIRING
Michael Schneider
SCENERYMichael Schneider, SESWC
FIGURES & MODELSMichael Schneider


1. Forces.


UNITED KINGDOM
(Alasdair, John)
© Michael Schneider


COLONISTS
(Bartek, David, Tim)

© Michael Schneider


2. The game.

This game was supposed to look completely different, but what happened was a series of our many failures. It started with the conservative manoeuvring of British troops and an effective artillery bombardment of the colonists' positions. Once these were softened, the British attack began. These were stopped, and British troops had to reform. Then a second attack began, which reached our fortifications. We were waiting for this, and then my brigade started moving. Unfortunately for me, I managed to activate it only once, and it ended up in an open field, exposed to British fire. Instead of attacking the exposed British flank, they engaged in an exchange of fire. This one had to end badly for my troops. John once managed to roll three sixes to hit, losing one of my militia units. Then there was an attack on the redoubt, which the British finally managed to capture after three rounds of fighting. At this point, the colonists decided to withdraw, and the battle ended with a British victory.


3. Links.

MICHAEL:

https://meneken.blogspot.com/2024/04/17th-of-june-1775-bunker-hill-awi.html

SESWC:

https://www.facebook.com/Seswc.co.uk/posts/828769389280394

FLICKR:

https://www.flickr.com/photos/asienieboje/albums/72177720316473759

czwartek, 18 kwietnia 2024

Mig Alley.

Blood Red Skies - this time set in the Korean War. Campbell prepared planes and we played another game using these great rules. We were able to play two games during the club night.


SCENARIO: Michael Schneider
UMPIRING
Michael Schneider
SCENERY: Bartek Żynda, Michael Schneider, SESWC
FIGURES & MODELSMichael Schneider


1. Game One

1.1. Forces.


USAF
(Alasdair, Andy, Tim)

1st Squadron

2 x Grumman F9F Panther (2 x 3)

2nd Squadron

2 x North American F-86 Sabre (2 x 3)

3rd Squadron

2 x North American F-86 Sabre (2 x 3)


NORTH KOREA
(Bartek, Campbell)

1st Squadron

2 x Mig-15bis (2 x 3)

2nd Squadron

2 x Mig-15bis (2 x 3)


1.2. The game.

In the first game, the objective was to shoot down or force the Panther patrol to return to base. The first turn saw the appearance of Panthers and Migs on the table. It was only in the second round that Sabres joined the action. Due to their speed advantage, the Migs engaged the Grumman patrol and managed to shoot one down and force them to turn back. When the Sabres joined the action, they managed to shoot down one Mig and force one of the squadrons to turn back. However, even though one squadron was forced to retreat, the North Korean Air Force still won the game by achieving their goal.


2. Game Two

2.1. Forces.


USAF
(Alasdair, Andy, Tim)

USAF
(Alasdair, Andy, Tim)

1st Squadron

4 x Grumman F9F Panther (1 x 5, 1 x 4, 1 x 3, 1 x 2)

2nd Squadron

2 x Lockheed F-80C  Shooting Star (1 x 4, 1 x 2)

3rd Squadron

2 x Lockheed F-80C  Shooting Star (2 x 3)


NORTH KOREA
(Bartek, Campbell)

1st Squadron

3 x Mig-15bis (2 x 3, 1 x 2)

2nd Squadron

3 x Mig-15bis (2 x 3, 1 x 2)


2.2. The game.

In the second game, we increased the number of planes and changed the objective. This time, the goal was for one side to take control of the battlefield by the end of the game. The game began with a MiG attack on the Grummans, resulting in a fierce fight. Unfortunately, one of the American planes was shot down during the conflict. Two squadrons, one Korean and one American, withdrew from combat during the fighting. When the Lockheeds joined the fight, they were able to shoot down one Mig and put two more to flight. Ultimately, only the American planes remained on the battlefield, and they emerged victorious.


3. Links.

CAMPBELL (SESWC):

Link to be updated soon...

FLICKR:

https://www.flickr.com/photos/asienieboje/albums/72177720316299536/

czwartek, 11 kwietnia 2024

Soor 1745.

The Second Silesian War, with Seven Years, rules written by Michael. The refight of the battle of Soor which was fought on 30th September 1745.


SCENARIO: Michael Schneider
UMPIRING
Michael Schneider
SCENERY: Bartek Żynda, Michael Schneider, SESWC
FIGURES & MODELSMichael Schneider


1. Forces.


AUSTRIA
(Alasdair, Bartek, Michael, Tim)

1st Infantry Brigade

2 x Musketeers
1 x Medium Gun

2nd Infantry Brigade

2 x Grenadiers
1 x Light Gun

3rd Infantry Brigade

2 x Musketeers
1 x Medium Gun
1 x Light Gun

4th Infantry Brigade

2 x Musketeers
1 x Light Gun

5th Infantry Brigade

2 x Musketeers
1 x Light Gun

1st Cavalry Brigade

1 x Cuirassiers
1 x Hussars
1 x Skirmishers

2nd Cavalry Brigade

1 x Dragoons
1 x Hussars
1 x Skirmishers


PRUSSIA
(Fred, Gordon, John, Peter)

1st Grenadier Brigade

2 x Grenadiers
2 x Medium Gun

2nd Grenadier Brigade

2 x Grenadiers
2 x Medium Gun

1st Infantry Brigade

2 x Musketeers
2 x Light Gun

2nd Infantry Brigade

3 x Musketeers
2 x Medium Gun

1st Cavalry Brigade

1 x Cuirassiers
1 x Hussars
1 x Skirmishers

2nd Cavalry Brigade

1 x Dragoons
1 x Hussars
1 x Skirmishers


2. The game.

At the beginning of the game, Prussian troops could deploy freely, whereas Austrian troops were already deployed. It should be noted that one of the cavalry brigades for Austrian players could only be activated in the third turn. The game had two main objectives: capturing the village of Burkersdorf and the hill of Graner-Koppe, both worth 3 victory points. Additionally, each destroyed unit was worth 1 point, and every cannon or skirmisher was worth 0.5 points.


At the start of the battle, the Prussian army lacked initiative and focused solely on guarding the village of Burkersdorf. As a result, the Austrian artillery was able to fire at the enemy without any hindrance. This was particularly evident on my flank, where my cannons, supported by skirmishers, inflicted heavy losses on the Prussian cavalry. As a result, I earned 2 victory points for our side. Alasdair also played a similar role, using his guns to wipe out two units of Prussian musketeers.


On the left flank of our army, the cavalry commanded by Tim advanced and successfully pushed back the Prussian cavalry led by Gordon. This allowed Tim to enter the Prussian flank and disrupt their formation. In response, the Prussian leaders Fred and Peter decided to launch an attack with their infantry. While the Prussian infantry initially showed strength by destroying one or two Austrian units, they suffered significant losses in the process, losing two of their own units. The game ultimately ended with an Austrian victory, as they were able to inflict greater losses on the enemy.


3. Links.

MICHAEL:

https://meneken.blogspot.com/2024/04/the-battle-at-klein-soor-1745-just.html

SESWC:

https://www.facebook.com/Seswc.co.uk/posts/823436183147048

FLICKR:

https://www.flickr.com/photos/asienieboje/albums/72177720316150698